Expert tips on assessing wind damage on roofs, from spotting shingle issues to using roofing inspection services. Protect your home by recognizing and addressing roof wind damage effectively.
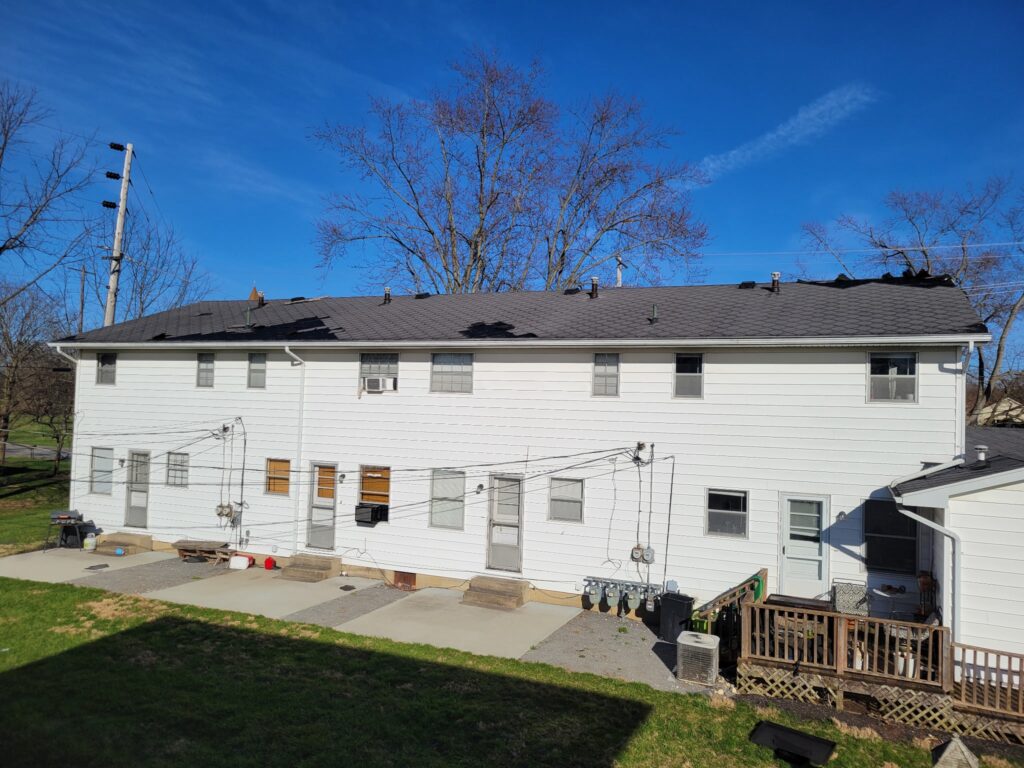
The storm has passed, and while your yard might be scattered with debris, a quick glance upward often suggests your home survived unscathed. But much like a bruise beneath the skin, your roof’s defenses can be compromised without showing a single missing shingle. While it is tempting to assume everything is fine because the structure looks intact, properly assessing wind damage on a roof requires looking beyond the obvious gaps to find the subtle injuries that eventually lead to costly leaks.
High winds do not just push against your home; they create a powerful suction effect known as wind uplift that pulls at your shingles like a vacuum. Even if a shingle settles back into place after a heavy gust, the adhesive seal that bonds it to the roof may have snapped permanently. Once this unsealing occurs, the material is free to flap in the breeze, creating horizontal creases that weaken the asphalt and allow water to quietly seep into the wood decking below.
Ignoring these minor signs often results in significant financial consequences, as trapped moisture can rot structural elements long before a water stain ever appears on your living room ceiling. Because spotting these subtle failures often requires a trained eye, the most effective strategy prioritizes personal safety over heroism. Recognizing these warning signs from the ground empowers you to know exactly when to call a professional like Roofs by Warren for a comprehensive roof wind damage inspection before a small problem becomes a major renovation.
Stay on the Ground: A Safe 15-Minute Exterior Wind Damage Walkthrough
Before you even consider dragging a heavy ladder out of the garage, take a walk around the perimeter of your home. Your yard acts like a crime scene for weather events, often holding the first clues to what happened overhead. Finding jagged pieces of asphalt shingles in your flower beds offers immediate confirmation that the roof’s seal is broken. Even without large debris, peek at your downspout splash blocks. A pile of loose mineral granules—the sand-like grit that protects the asphalt—indicates the wind scoured the roof surface, leaving it vulnerable to “sunburn” and premature cracking.
Once you have inspected the lawn, grab a pair of binoculars and stand across the street to improve your viewing angle. Employ a methodical “eave-to-peak” scanning strategy, starting your visual check at the lowest point near the gutters and slowly working up to the highest ridge. Instead of just looking for holes, focus on the horizontal lines where shingles overlap. You are hunting for dark, irregular shadows underneath the shingle tabs, a sign that wind has lifted them up and broken the adhesive seal required to keep water out.
To ensure you capture all the evidence without leaving the ground, complete this rapid exterior survey:
● Shingle Fragments: Scan shrubbery and grass for torn asphalt pieces.
● Granule Accumulation: Check downspout exits for excessive loss of protective coating.
● Gutter Alignment: Look for metal troughs that are pulled away from the house or dented.
● Collateral Indicators: Note damage to fences or deck furniture, which confirms wind speeds capable of lifting roofing.
If this ground tour reveals debris or damage, your home’s protective shell is likely compromised. The next obvious indicator involves spotting the “jigsaw” gaps where shingles have been completely torn away.
Spotting the ‘Missing Jigsaw Pieces’: Identifying Wind Uplift and Shingle Displacement
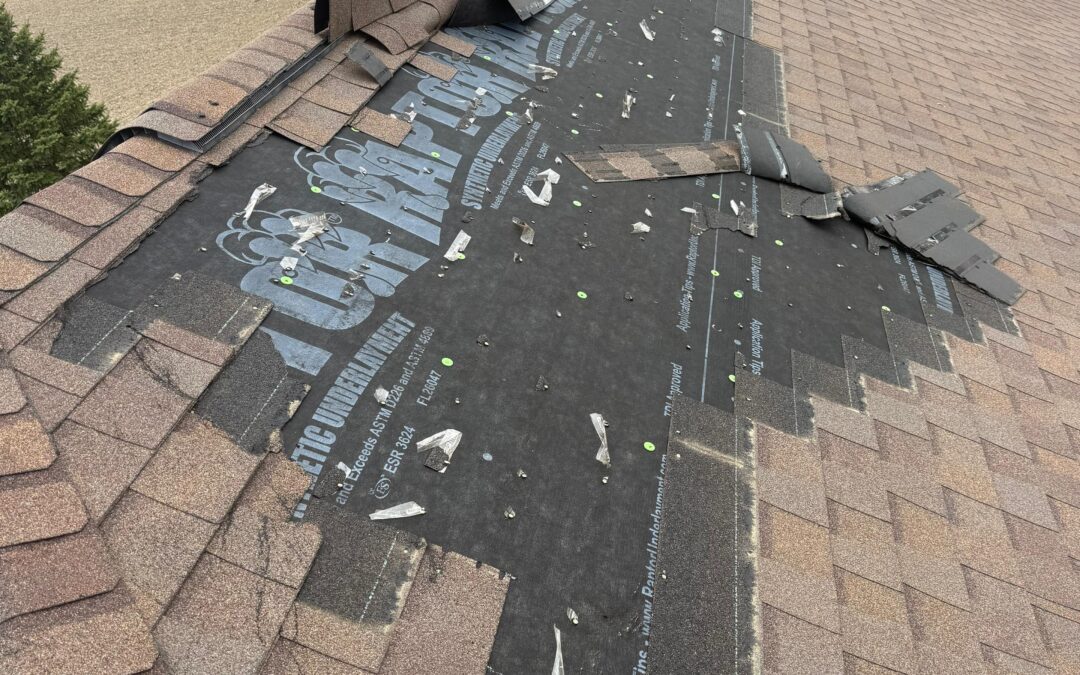
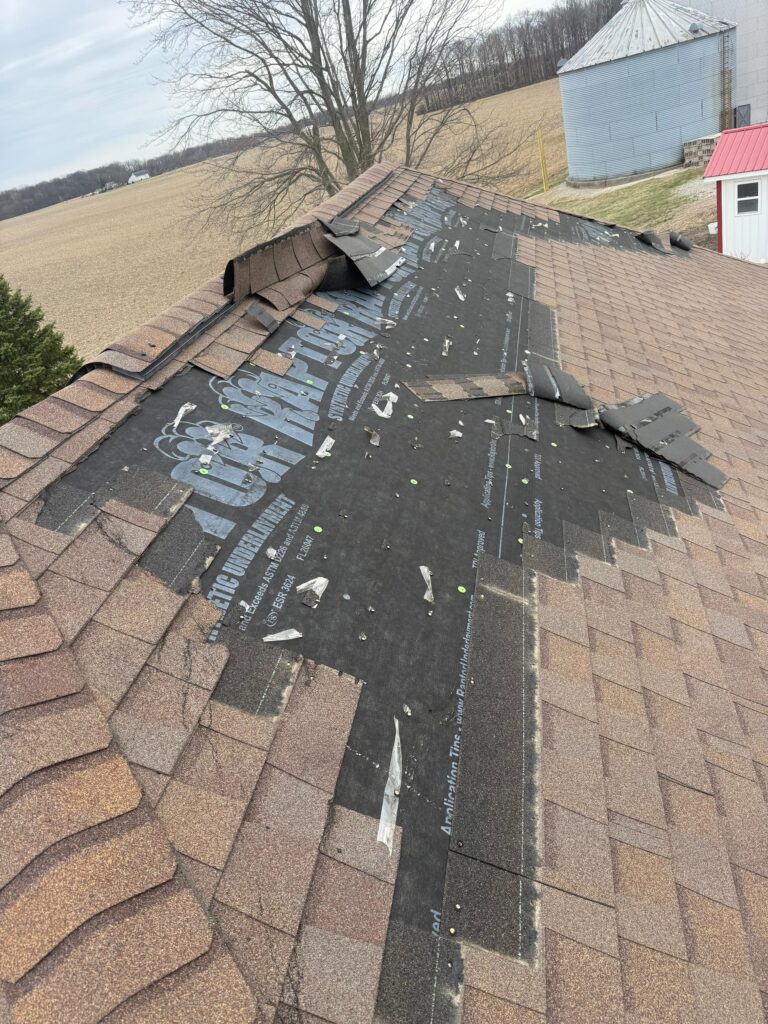
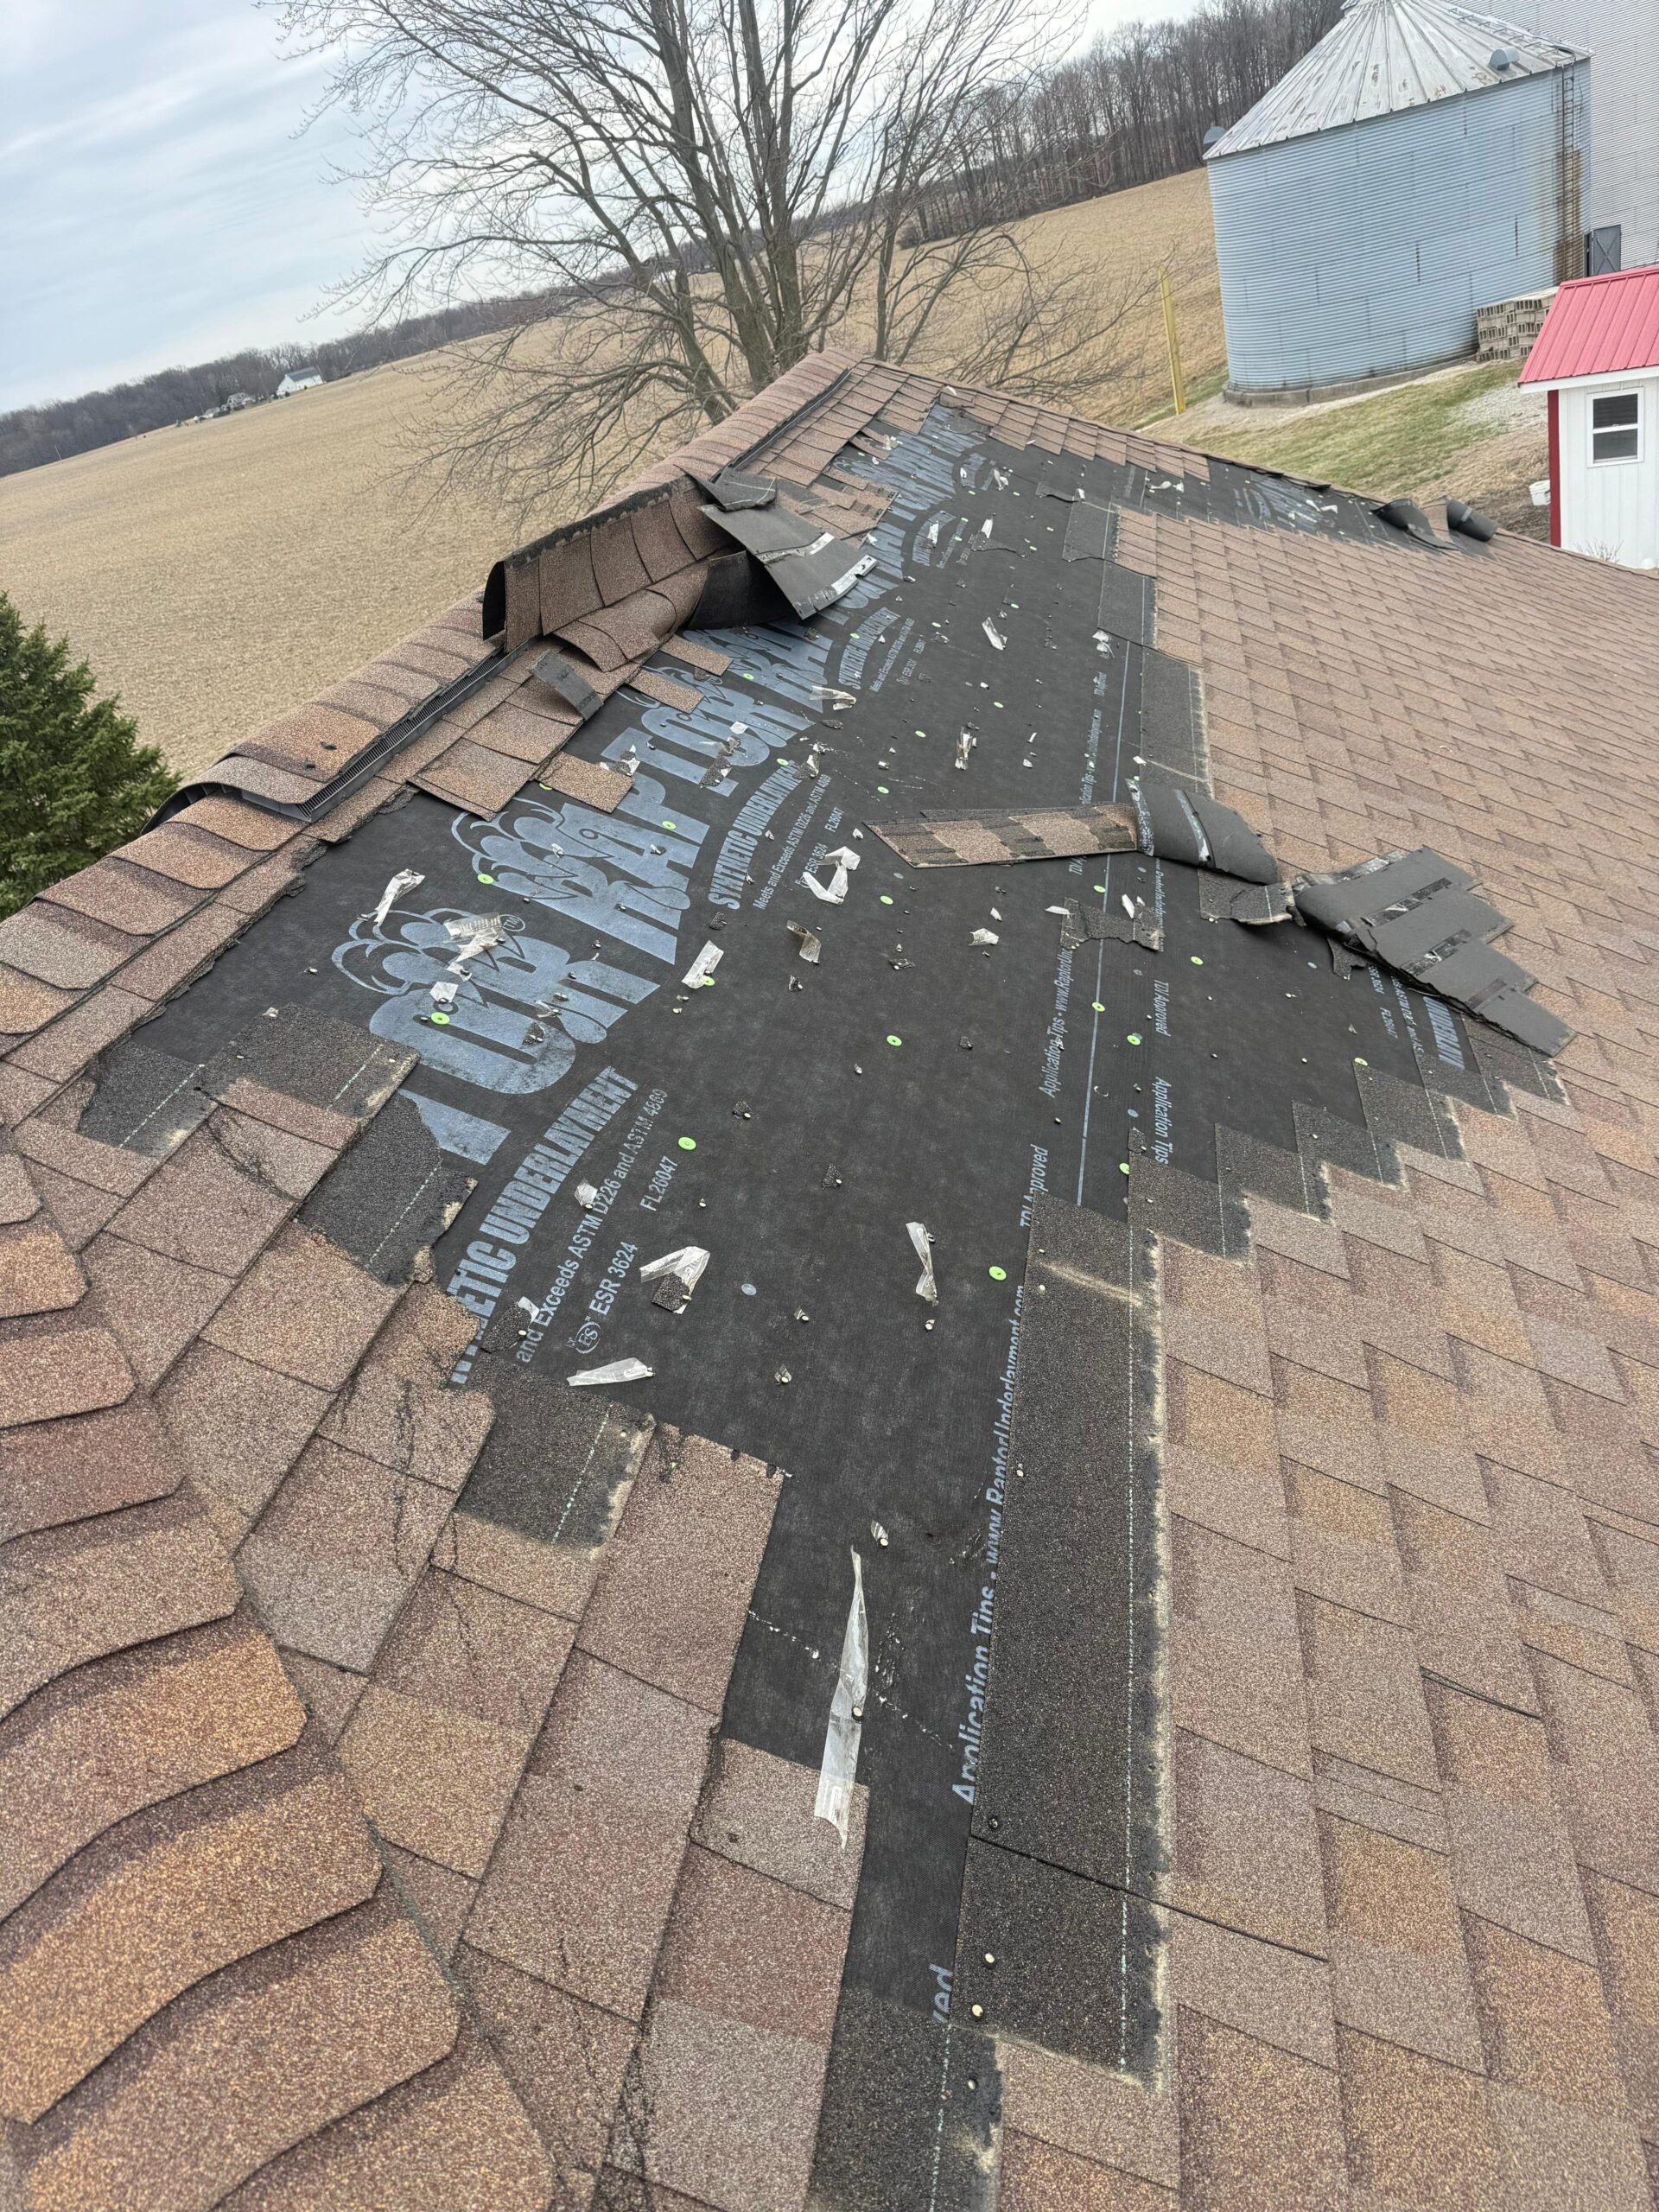
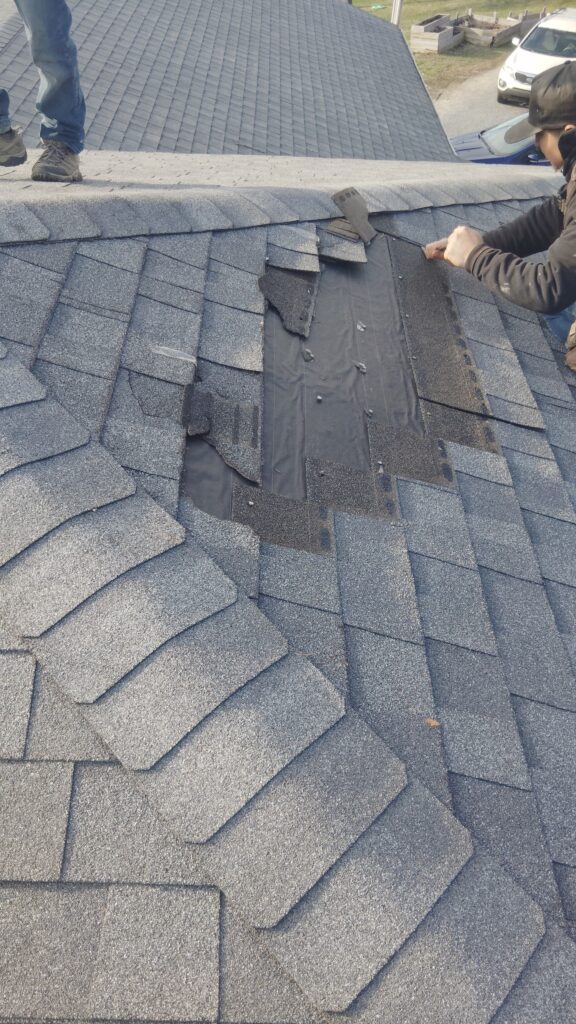
When you scan your roofline, the most obvious sign of failure often resembles a gap in a smile. Strong gusts create a suction effect known as aerodynamic uplift, which acts on your roof much like the force that turns an umbrella inside out on a blustery day. If wind speeds exceed 50 mph, this upward pressure can be strong enough to snap the adhesive bond holding the asphalt tab flat. Once that sticky seal breaks, the next gust catches the exposed edge like a sail, ripping the material clean off the deck and depositing it in your yard.
Identifying these gaps is usually straightforward because the color contrast is stark. You will typically see a dark, flat rectangular patch where the textured shingles used to be, revealing the “underlayment” beneath. Think of this underlayment layer as a lightweight windbreaker worn under a heavy winter coat; it offers temporary resistance against moisture but cannot withstand a heavy downpour indefinitely. When you spot this exposed felt or synthetic matting, your home is essentially naked against the elements, making immediate tarping or repair critical to prevent water from rotting the wood sheathing below.
Distinct clean lines around a missing patch usually confirm recent storm activity rather than slow decay, distinguishing specific event damage from general wear and tear. While a missing tab is the loudest alarm bell your roof can ring, the wind often leaves behind quieter, more insidious clues that do not involve debris landing on the lawn. These subtle failures happen when the shingle lifts but does not tear, creating a hidden vulnerability.
Detecting the ‘Invisible Lift’: How Creased Shingles Compromise Your Roof’s Seal
Not every casualty of a storm ends up on your front lawn; often, the most dangerous damage occurs when wind lifts a shingle up and then drops it back into place. This violent flapping motion snaps the sealant strip—a line of adhesive that glues your roof layers together. From the street, the roof might appear intact, but that tab is now like an unlatched door, waiting for the next gust to blow it open and allow driving rain to penetrate the barrier.
You can usually spot this issue by scanning for a thin, dark horizontal line running across the top third of a shingle tab. This “crease” is effectively a bruise in the asphalt mat, like the permanent ridge left behind when you fold a heavy piece of cardboard. Identifying creased or curled roofing is vital because that dark line indicates the material has fractured, creating a weak point where water will eventually seep through even if the tab is lying flat.
Distinguishing active wind damage vs normal wear and tear often relies on understanding why that adhesive bond failed to reconnect. Once the seal breaks, dust and pollen immediately coat the sticky surface, preventing the sun from ever “thermal sealing” the shingle back down. If safe access allows you to gently test a tab with your thumb, a wind-damaged section will lift effortlessly, offering no resistance compared to the surrounding area.
While a broken seal compromises the roof’s structure, the wind’s physical impact also degrades the shingle’s protective skin. Just as the matting cracks under pressure, the surface coating can be scoured away, leading to another subtle sign of storm stress.
Check for ‘Shingle Sunburn’: Identifying Granule Loss and Debris Scouring
Asphalt shingles are topped with crushed stone granules that function exactly like sunscreen for your home. When intense gusts scour the roof, this protective outer layer can be stripped away, leaving the underlying asphalt exposed to harsh UV rays. Without this “skin,” the material dries out, becomes brittle, and cracks significantly faster than the rest of the roof.
Visible scour marks often appear where tree limbs or airborne debris have repeatedly rubbed against the surface during the storm. These abrasions typically look like scratches or dark patches where the colored coating has been worn down to the black asphalt mat. Even if the shingle isn’t torn, this surface damage, often called “shingle sunburn,” compromises the roof’s long-term integrity.
You rarely need to climb high to confirm granule loss on shingles after high winds; gravity usually brings the evidence down to eye level. A small amount of runoff is normal, but piles of displaced sediment looking like black sand indicate a problem. Check these three collection points for excessive accumulation:
● Inside the troughs of lower gutters
● On splash blocks at the base of downspouts
● Where drainage exits onto driveways
With the exterior check complete, a proper wind damage assessment plan moves inside to spot the water you can’t see from the curb.
Look Up, Not Out: Identifying Interior Signs of Roof Leaks After High Winds
External inspections only tell half the story; wind-driven rain can sometimes bypass shingles without tearing them off completely. The first warning of indoor signs of roof leaks after storm events isn’t always a puddle on the floor, but often a heavy, humid smell in the attic or a faint discoloration on the ceiling. Because water follows the path of least resistance, it frequently travels along horizontal beams before dripping, meaning that brown spot in the living room is rarely located directly below the actual hole in the roof.
Locating the true source requires a flashlight and a simple method called “rafter tracing.” Turn off the attic lights during the day and scan the wooden underside of the roof deck for any pinpricks of daylight, which indicate shifted shingles. If it is raining, shine your beam along the framing timbers to look for wet streaks that glisten against the wood. Water often clings to these wooden paths, traveling several feet from the damage point before finally dropping into your insulation.
Distinguishing between historical stains and new damage helps determine if you need emergency repairs. An active leak will darken the wood and feel cool to the touch, eventually leading to structural integrity issues like rotting or warping if ignored. Old stains, by contrast, appear dry and faded. Once you have confirmed the attic’s condition, the final step involves checking the metal guards designed to seal the roof’s vulnerable edges.
Checking the Metal Guards: Spotting Damage to Flashing and Gutter Systems
While shingles cover the flat expanses, metal strips called “flashing” serve as the watertight seals for vulnerable corners and joints. Strong gusts act like a pry bar on these edges, causing “lift” that creates gaps where water can enter. When checking roof flashing for storm damage, look for metal that appears bent or raised, as even a quarter-inch opening allows wind-driven rain to bypass your roof’s primary defenses and seep into the walls.
Your visual sweep should focus on four specific metal components that are most susceptible to warping or displacement. Using binoculars from a safe spot in your yard, scan for these red flags:
● Chimney Aprons: Gaps where the metal meets the brick, indicating the waterproof seal has broken.
● Drip Edges: The metal rim along the roofline should be straight; twists or separation expose the wooden decking to moisture.
● Gutter Spikes: If the nails holding your gutters are pulled out, the “pitch” (slope) changes, preventing proper drainage.
● Vent Caps: Dents or missing hoods on exhaust pipes, which can block airflow or let rain directly into the home.
Identifying these subtle metal deformations is critical because they often lead to rot in the fascia boards long before a ceiling leak ever appears. Since repairing flashing often requires disturbing the surrounding shingles, confirming the extent of the issue is a job for professionals like Roofs by Warren have noted these potential problem areas, the next priority is translating your observations into a clear report that your insurance adjuster cannot ignore.
Moving from Damage to Dollars: How to Document Roof Issues for an Insurance Claim
Transforming your visual observations into a funded repair starts with undeniable evidence. Before you call your agent, build a digital “Damage Portfolio” to support your case when learning how to file a roof insurance claim for storm damage. This collection prevents common disputes about whether damage was pre-existing or caused specifically by the recent event. Your evidence kit should include:
● Context Shots: Wide-angle photos from the street showing your house number and the general condition.
● Specifics: Close-ups of shingles on the lawn, dented gutters, or crushed landscaping.
● Collateral Indicators: Pictures of dented mailboxes, AC units, or fences to prove the storm’s direction and severity.
● Timeline Verification: Screenshots of local weather reports or news alerts confirming wind speeds on that specific date.
Financial outcomes rely heavily on understanding the difference between Actual Cash Value (ACV) and Replacement Cost Value (RCV). If your policy covers RCV, the insurer generally pays the full price of a new roof minus your deductible. However, ACV policies factor in depreciation—much like the “Blue Book” value of a used car—meaning the payout covers only what your aging roof is currently worth. This distinction often surprises homeowners who find themselves responsible for a significant portion of the cost of repairing wind-blown roof sections out of pocket.
Selecting a partner to verify this damage requires caution, as severe weather often attracts transient “storm chasers” who prioritize volume over quality. Instead of hiring the first person who knocks on your door, focus on hiring a certified roof inspector for damage who has a local physical address and valid state licensing. A local professional understands regional building codes and will be available to honor workmanship warranties long after the storm clouds clear. With your evidence gathered and a trusted expert identified, your next step is preventing water from entering while the paperwork processes.
Stop the Drip: Emergency Tarping and Hiring the Right Certified Inspector
Most insurance policies include a “duty to mitigate” clause, which means you must act like a first responder for your home to prevent water from soaking into insulation or drywall. If you leave a hole open and rain ruins your hardwood floors a week later, that secondary damage might not be covered. While professional help is best, you can perform emergency roof tarping after a wind storm safely by avoiding new nail holes; instead, drape the tarp over the ridge line and weigh down the edges with sandbags to create a temporary, non-destructive seal.
Once the immediate leak is contained, the focus shifts to finding a partner who offers an honest assessment rather than a high-pressure sales pitch. Storm chasers often flood neighborhoods after severe weather, so prioritize hiring a certified roof inspector like Roofs by Warren who can prove they have a physical office nearby and active state licensure. A legitimate contractor will happily provide a certificate of insurance and local references, whereas a fly-by-night operator usually relies on vague promises and demands upfront cash.
Verifying these credentials protects your wallet, but understanding the repair roadmap ensures long-term security. A quality inspection report serves as the foundation for restoring your home’s integrity, moving you away from emergency reaction mode toward a permanently fortified shelter.
From Anxiety to Action: Your 3-Step Plan for a Wind-Resistant Home
You no longer need to wait for a water stain to appear on your ceiling to know if a storm has compromised your home. By understanding the specific visual cues—from the subtle grit of granules in your downspouts to the stark outline of creased shingles—you have moved from a state of uncertainty to proactive protection. You now possess the knowledge to distinguish between minor cosmetic wear and the kind of structural vulnerability that requires attention, ensuring your home remains the safe shelter it was designed to be without taking unnecessary risks on a ladder.
Your immediate priority is to execute a simple 24-hour post-storm routine while the evidence is fresh. Start with a safety-conscious ground-level walkaround to photograph any debris or irregularities, creating a timestamped record that will be invaluable for potential insurance discussions. If your survey reveals missing tabs or significant bruising, do not attempt a dangerous DIY fix. Instead, use your documentation to facilitate a clear conversation with professional roofing inspection services, who can safely verify the extent of the impact and finalize your next steps.
Treating this evaluation as a regular habit rather than a panic response transforms your roof from a source of anxiety into a manageable asset. Maintaining a simple log of these checks does more than just solve today’s problem; it builds a history of diligent care that enhances your property’s resale value. Ultimately, properly assessing wind damage on roof surfaces is about stewardship, allowing you to catch small issues early so you can rest easy during the next season of rough weather.